Introduction to Chocolate Peanut Butter Protein Balls
Chocolate and peanut butter is one of those combinations that hits instantly familiar — like a childhood memory wrapped in something grown-up and sensible. I make these chocolate peanut butter protein balls when I want that flavor hit but don’t want to derail a day of meal prep. They take about 10 minutes to pull together, no baking required, and the kitchen smells like warm peanuts and cocoa the whole time. They’re fast, portable, and sit in the fridge waiting to rescue a cranky afternoon or post-workout slump.
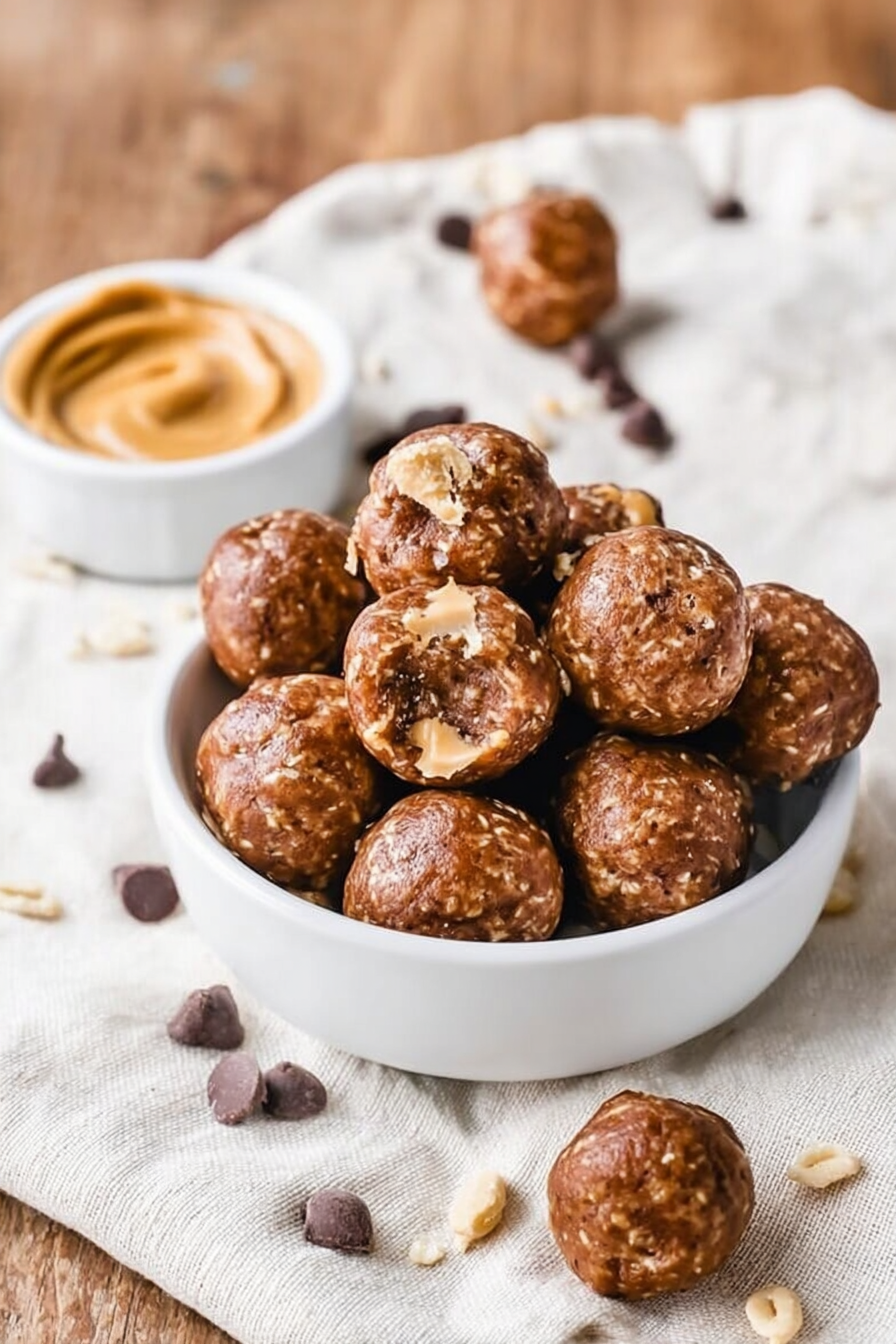
These are the kind of no-fuss snacks I keep on rotation: simple ingredients, predictable results, and the flexibility to tweak them depending on what I have on hand. They’re dense, a little fudgy, and not at all dry — if you follow a few small tricks below, you’ll end up with balls that are pleasantly sticky but still hold their shape.
Benefits of Protein-Rich Snacks
Reaching for a protein-rich snack instead of sugary or ultra-processed options has real effects on how you feel over the next few hours. Protein helps repair muscle tissue, supports recovery after workouts, and—perhaps most immediately useful—keeps you feeling full longer. That means fewer impulse trips to the vending machine and steadier energy through the day.
Practically, a snack with a decent amount of protein (think roughly 6–15 grams per snack depending on your needs) can blunt hunger and reduce the calories you might consume at the next meal. For athletes and regular exercisers, the added protein supports muscle repair and recovery. For busy professionals or parents, it’s about satiety and keeping mental fog away. For people on dietary plans that prioritize higher protein, these balls are an easy way to sneak extra protein into an otherwise sweet craving.
There’s a fair amount of research showing that higher-protein meals and snacks increase satiety and can help with weight management when used as part of a balanced diet. In my own testing, swapping a candy bar for two of these protein balls after midday workouts keeps my appetite calmer and my energy steadier than sugary snacks.
For a different but complementary snack idea, try our banana peanut butter oatmeal bars — they pair the same comforting flavors with a slightly different texture and make great grab-and-go breakfasts.
Ingredients Needed for Chocolate Peanut Butter Protein Balls
- Old fashioned rolled oats – provide texture and bulk; they soak up moisture and bind the balls without making them gummy. For a chewier bite, use rolled oats; if you only have quick oats, expect a softer texture.
- Natural peanut butter – the flavor base: nutty, slightly salty, and sticky enough to bind. If your peanut butter separates, stir it well; smooth or crunchy both work depending on whether you like a little crunch.
- Honey – acts as the sweetener and additional binder. It gives a glossy, slightly sticky finish that helps the balls hold together; swap with maple syrup for a vegan twist.
- Chocolate protein powder – packs in protein and deepens the chocolate flavor. Choose whey, pea, or a blend depending on dietary needs; different powders absorb liquids differently so you may need to tweak the liquid amount slightly.
- Chocolate chips – optional but delightful for melty chocolate pockets. Mini chips distribute better through the dough. For lower sugar, use dark chocolate or cacao nibs.
Tips on quality: use a peanut butter you like eating by the spoon, because its flavor is front and center. For protein powder, a chocolate-flavored powder makes these feel indulgent; if you use an unflavored or vanilla powder, you may want to add a touch more cocoa. If you need gluten-free, make sure to use oats labeled gluten-free.
Step-by-Step Instructions
Prep time: about 10 minutes. Total time: 10 minutes. Yield: 24 balls.
- Place 1 ½ cups old fashioned rolled oats, 1 cup natural peanut butter, ¼ cup honey, 2 scoops (about 50–60 grams) chocolate protein powder, and 2 tablespoons chocolate chips in a large bowl and stir to combine. Use a sturdy spoon to start; the mixture is thick and resists blending at first.
- Getting the mixture to combine takes a little arm muscle and it may seem too thick at first, but it will come together as you keep mixing. I usually press the mixture against the side of the bowl with the back of a wooden spoon, then switch to my hands when the dough starts forming. Kneading it briefly with clean hands helps incorporate the protein powder pockets and ensure even distribution of oats.
- Once combined, use a small cookie scoop or a tablespoon to scoop and form the dough into balls. Press and roll between your palms until smooth. If the dough is crumbly, add a teaspoon or two of honey or a little more peanut butter; if it’s too sticky, chill the bowl for 10–15 minutes or add a tablespoon more oats.
- Place the formed balls on a plate or baking sheet. If you like, roll them in extra chocolate chips, cocoa powder, or even a light dusting of crushed nuts for texture. They’re ready to eat immediately, but chilling firm them up and makes them easier to handle.
- Store in a covered container in the fridge or freezer.
Why these steps matter: mixing thoroughly prevents pockets of dry protein powder that can taste chalky; kneading warms the fats in the peanut butter so it becomes pliable and binds better. If you skip that step, you’ll often get crumbly bits that don’t hold shape. Also, don’t try to heat the mixture — these are no-bake for a reason: heat can make the peanut butter oil separate or make the chocolate chips melt into clumps.
Troubleshooting common problems:
- Too dry / crumbly – add a teaspoon of honey or a bit more peanut butter, or press the dough together with wet hands to help it bind; you can also let it sit 5 minutes so the oats hydrate slightly.
- Too sticky – chill the mixture for 10–20 minutes, then form balls; or add a tablespoon of oats at a time until manageable.
- Chalky powder taste – make sure the protein powder is well mixed in. If texture still bothers you, swap to a creamier protein powder or add a splash of milk (dairy or plant) to smooth it out.
Customizing Your Protein Balls
One of my favorite things about this base recipe is how forgiving it is. I’ve tested dozens of variations and keep notes about what changes the texture and what changes the flavor. Here are ideas I regularly use:
- Nut swaps – almond butter or cashew butter gives a milder, sweeter flavor. Sun butter works well if you need nut-free.
- Protein powder swaps – whey for creaminess, pea for vegan options. If you use an unflavored powder, add a tablespoon of cocoa to boost chocolate notes.
- Add-ins – chopped nuts, chia seeds, flaxseeds, or a spoonful of shredded coconut. Dried cherries or cranberries add tartness and chew.
- Spice – a pinch of sea salt to lift the chocolate, or a little cinnamon for warmth. A dash of instant espresso powder sharpens chocolate depth if you like mocha notes.
- Coatings – roll in cacao nibs for crunch, cocoa powder for a truffle-like finish, or crushed pretzels for sweet-salty contrast.
If you enjoy these chocolate peanut butter treats, check out our no-bake protein balls for even more variety!
Storage Tips for Meal Prep
These protein balls are ideal for batch cooking. I usually make a double batch on Sunday and portion them into containers so there’s a snack within reach all week.
- Fridge – store in an airtight container for up to 7 days. They’ll firm up and become pleasantly chewy.
- Freezer – freeze on a lined tray until solid, then transfer to a freezer-safe bag or container for up to 3 months. Thaw in the fridge overnight or enjoy straight from the freezer for a firmer, almost-frozen bite.
- Best containers – shallow airtight containers or mason jars work well. If stacking, separate layers with parchment so they don’t stick together.
How to tell they’re no longer good: off smells (rancid or sour) or visible mold. Because these contain nut butter, they can go rancid if left out too long at room temperature — keep them chilled if you’re not eating them within a couple of days. Looking for other easy make-ahead snacks? Check out our no-bake chocolate oat bars that store well for quick snacks!
Nutritional Information Breakdown
Here’s the baseline nutritional info provided for the original recipe (per ball):
- Calories – 114 kcal
- Protein – 6 g
- Fat – 6 g
- Carbohydrates – 8 g
- Yield – about 24 balls per batch
So if you eat two balls as a quick snack, you’re getting roughly 220–230 calories and about 12 g of protein — a compact, satisfying option. Swap notes:
- Using a higher-protein powder or adding a scoop more protein powder will increase protein and could dry the dough (add a touch more peanut butter or a splash of milk to compensate).
- Using a sugar-free sweetener or reducing honey lowers the carbs; using maple syrup instead of honey gives a slightly higher carb count and a looser dough.
- Choosing a lower-fat nut butter reduces calories from fat but may make the balls less cohesive; you’ll likely need to add a little more binder like honey or a tablespoon of softened nut butter.
Explore our high protein breakfast bowls to discover more nutritious options that support a balanced diet.
Frequently Asked Questions
- Are these protein balls healthy?Yes, especially when made at home! You control the ingredients, so you can emphasize whole-food sources of protein and healthy fats. They’re great for a quick energy boost and make a solid healthy snack compared to packaged alternatives.
- Can I adjust the sweetness of the protein balls?Absolutely! Adjust the honey to taste, or substitute with maple syrup or a non-caloric sweetener like stevia or monk fruit if you prefer lower sugar. If you reduce sweetener, a pinch of salt can help balance flavors.
- How can I make these protein balls nut-free?Use sunflower seed butter (sun butter) or soy nut butter in place of peanut butter. The texture and binding behavior are similar, though some seed butters can be slightly thinner, so you may need a little more oats or a touch less liquid.
- What are some good add-ins for these protein balls?Great add-ins include chopped nuts, seeds, dried fruits, or superfoods like chia seeds and flaxseeds. I like a tablespoon of chia for texture and omega-3s, and a handful of chopped almonds when I want extra crunch.
- How should I store the protein balls?Store them in a covered container in the fridge for up to a week or in the freezer for longer shelf life. Thaw in the fridge or eat from frozen for a firmer bite.
- Can I bake these?No. These are designed as a no-bake snack. Baking changes the texture, can dry them out, and may cause the nut oil to separate. If you want a baked protein treat, look for bar or cookie recipes specifically designed for baking.
Conclusion: Enjoying Your Healthy Treats
These chocolate peanut butter protein balls are one of my go-to snacks because they’re quick to make, unpretentious, and actually taste like a treat without being overly sweet. I’ve tested the ratio a few times — more peanut butter gives a richer mouthfeel, more protein powder firms them up, and a little extra honey makes them shinier and stickier. The best part is how customizable they are: switch nut butters, add seeds, or toss in dried fruit depending on what you need.
Make a batch, tuck them into your lunchbox, and see how they change your snack habits. If you tweak the recipe, I’d love to hear what you tried — I’m always adapting mine depending on the season and what’s in my pantry. For more snack ideas and make-ahead treats, check the other recipes linked throughout this post. Happy snacking!
Chocolate Peanut Butter Protein Balls
Ingredients
Method
- Place oats, peanut butter, honey, protein powder and chocolate chips in a large bowl and stir to combine.
- Continue mixing until combined; using hands to knead helps.
- Use a small cookie scoop to form the dough into balls.
- Store in a covered container in the fridge or freezer.